working on a new stop motion. it's going to be rad, all about realizations and kind of giving an insight as to what i think about when you're not looking, and what i listen to and remember when you're just rattling off things.


while making this clip i had some issues with lights exploding and no longer working. so there is some discrepency in lighting yes, but i think it works with the text and kind of making your eye jump around, feeling a bit creepy. just like the sound. this will be a fun project.


for our vessel project I had the idea that I wanted to create a something that was both feminine and masculine. I drew my inspiration from the linga and yoni combination in Hindu artwork.


these objects brought together in worship represent creative energy, or creation. I thought it would be clever to create a vessel that was more phallic in nature, but had obvious feminine features.


to finish this project I plan to smooth the top and bottom edges out to make them feel more with the flow of the object, as well as smoothing the overall surface of the object.

in my mind, if this vessel had a purpose it would be to bring the rose water to the temple to be poured out during times of worship.


I plan on glazing this red. the piece is about the passion of creation, and red rockets with boobs. it is also about feeling powerful and feminine all in one vessel.

After realizing just how long I had been neglecting my blog I decided perhaps it was time to come back and give it a go again. Unfortunately, after my last update I attempted to cast a mold out of my clay model, and through a series of unfortunate events the clay piece was completely destroyed and the mold was not capable for use. Trying to not let this get me down to the point of not continuing the project (nay, even the class!) was admittedly very difficult. But I digress, so let us now turn to what I /did/ do for this project.

Chapter Two: Take a mold of the clay

Simple as it sounds. This time much more simple as there were no undercuts, unseen or otherwise, to worry about. For my new object I chose a large four inch gear with 21 teeth to be used as an award for a local medieval studies group to use as awards for the 21st year of an event they were attending. The shape is easily visible in the mold here:


Chapter Three: Cast a wax positive from your mold

First, to cast a wax positive you have to get everything ready, which can take a while if you want to pretend like you're patient.

The wax must be heated up to the point of being thoroughly melted, and then brought back down to pouring temperature of ~165 F.


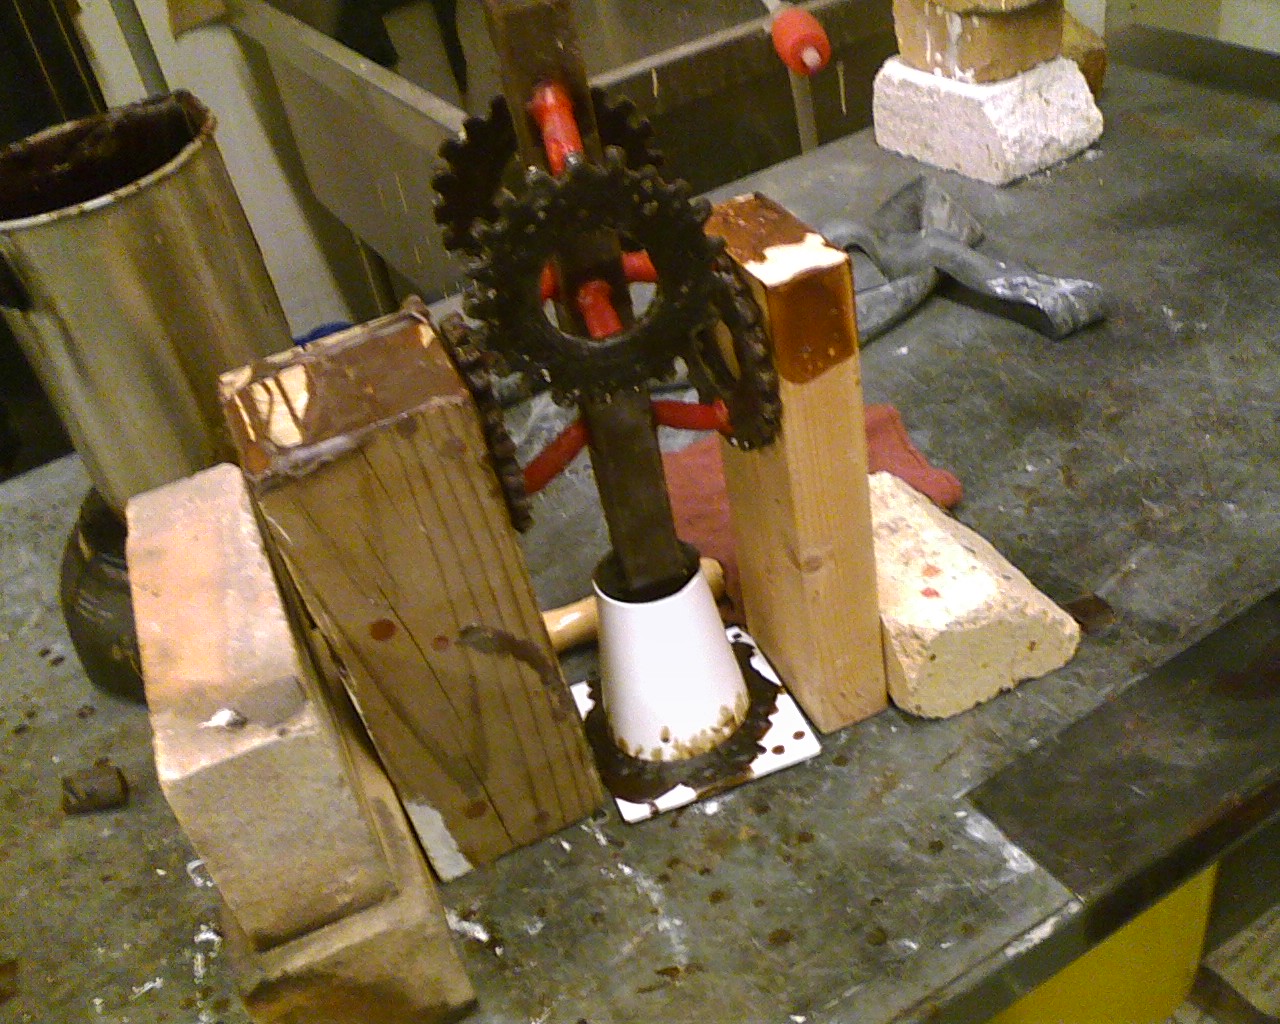
Additionally, any molds that will be used must soak while submerged in water until escaping air bubbles are no longer visible. In the next image you can see both my mold soaking as well as the mold for the main part of the sprue contraption.


Once you have your wax to the proper temperature, your mold prepared, and even more importantly your mold sitting somewhere level and steady, it is time to pour the wax into the mold.


After letting it cool for about twenty minutes I was able to pop it out, pour the next one, and work on refining the wax version of my gear. Originally I was attempting to do this with metal tools which left my hands and elbows aching.


I thankfully found the wax carving tools and decided to gingerly work the gears I had made into a pleasing surface texture and fix the teeth a bit as the mold degraded and produced crappy and crappy gears.

And then there were four.


Chapter Four: Sprue wax positive

Creating this contraption is an important process of creating a mold that can hold up to having molten bronze poured into it. You work upside down, creating the tube work that will allow the wax to pour out of the ceramic shell mold and the bronze to pour into the areas that you want to cast. Everything must be attached and angled in such a way that everything properly empties and fills.


Chapter Five: Use ceramic shell investment over sprued wax positive

This process was kind of gross and difficult to take pictures of during as all hands were needed on deck for this part. The ceramic shell consists of a mixture of a liquid that has the consistency and color of radioactive alien piss and a silicon based powder stuff that requires you use a mask while working with it as not to breathe in the tiny shards of evil.

With all the technelogical advances we seem to have come up with the best way to mix these two ingredients together is as follows.
  1. Attatch a mixing tool to an eletctric drill and stick it into the alien pee.
  2. Have a buddy start scooping handfulls of the silicon powder from their bucket into your bucket.
  3. Use the drill to stir until the whole thing is nice and thickened up.
After this is done the mixture is placed into a much larger mixer to spin around until we were ready to dip our pieces.


Chapter Six: The Bronze Pour

Once we got to site for our bronze pour we started heating up the chunks of bronze and baking our now ceramic shell incrusted wax pieces. The shell changed in color from the orange-yellow to a more cement color.

The shells were then placed into barrels surrounded with sand, the form created by the paper cup on the sprue now facing upwards to be the spout in which to pour the bronze.

Once the bronze was well above 2000 F we began suiting up and getting ready for the actual pouring process. I got the opportunity to be one of the individuals doing the pouring during the first round of pieces.


The process was exciting, and finding time for the final chapter of this project while starting the first chapter of the next should be challenging. Hurray bronze.


For our next two projects in sculpture we're going to be working with metal. One will be a bronze cast, and the other will be metal fabrication.

For the metal fabrication project my ideas are still very much so in their infant state, with just the idea that I really want to get across the idea of individuals coming together to make one... I have this image in my head of many arms reaching skyward and towards each other, intertwining. Deciding on a system to recreate and a form to communicate this idea will be an enjoyable journey.

As for the bronze sculpture I am fairly set on doing a personalized deity idol, drawing influence from Hinduism and Buddhism. I've been looking through some images and am making decisions on what my deity would look like.


While my injury from constructing the saw put me behind schedule a little bit things went fairly smoothly last week. I was able to observe the use of a neat, groove making tool we had in the shop. Part of the sculpture is a piece of the back of the chair that fit into grooves on other sections of the chair's body. I wanted to incorporate this design choice with the construction of my piece. Unfortunately, we had to cut a groove all along the side of the circle rather than just where the piece would fit into it, but this will be hidden by the drawing that will enclose the top.


It fit very nicely after some slight sanding was completed on it, and the chair legs after being modified in size were used as the other two columns, as seen below.


 Placement of the legs proved more difficult. Two of the legs are constructed from the hind leg/backrest section and had to be modified to fit flush with the bottom of the sculpture. For added support a beam was added to attach the legs to. Below is the incorrect way to add this beam!


After the first two legs were screwed on, the third and final leg had to be constructed from a 1x8 and placed on the sculpture in such a way that it would hold itself up. Finding balance was difficult as the entire top section likes to lean forward due to more weight in that area from the legs. Thankfully it will stand, but is not the safest, let children run around it and stuff, sort of construction.

Tonight I stained the pieces of plywood to try to match them to the rest of the sculpture. The stain came out pretty well, but as I was using some left over stain from the sculpture I ran out of the color I wanted to us before all areas could be covered. As it is due tomorrow these areas will most likely stay unstained until a later date, but are for the most part not visible unless one feels the need to investigate every angle of the sculpture (you know, liek the bottom).

All that is left for me to complete before class tomorrow is attaching the drawing and hoping the damn thing doesn't decide to fall over if someone sneezes during critique.

Step 1. Acquire a chair for free.


Step 2: Deconstruct the chair both physically and menrally.


Step 3: After deciding on a design, begin construction. And for Boonstra's sake try not to cut off your flesh.